QuickBooks Integration

For Shopware

Pricing

26,300.00

Cancelable as per T&C

Buy Now
Request Customization

Details

Available: English
Category: Accounting

Highlights

  • Time Savings: Reduce manual data entry and errors, freeing up time to focus on growing your business.
  • Improved Accuracy: Ensure consistent and accurate financial data across both platforms.
  • Enhanced Financial Insights: Gain better insights into your business performance with integrated financial reports.
  • Streamlined Operations: Automate routine tasks to improve operational efficiency.
  • Scalable Solution: Support for multiple currencies will be available in next phase.

About the Extension

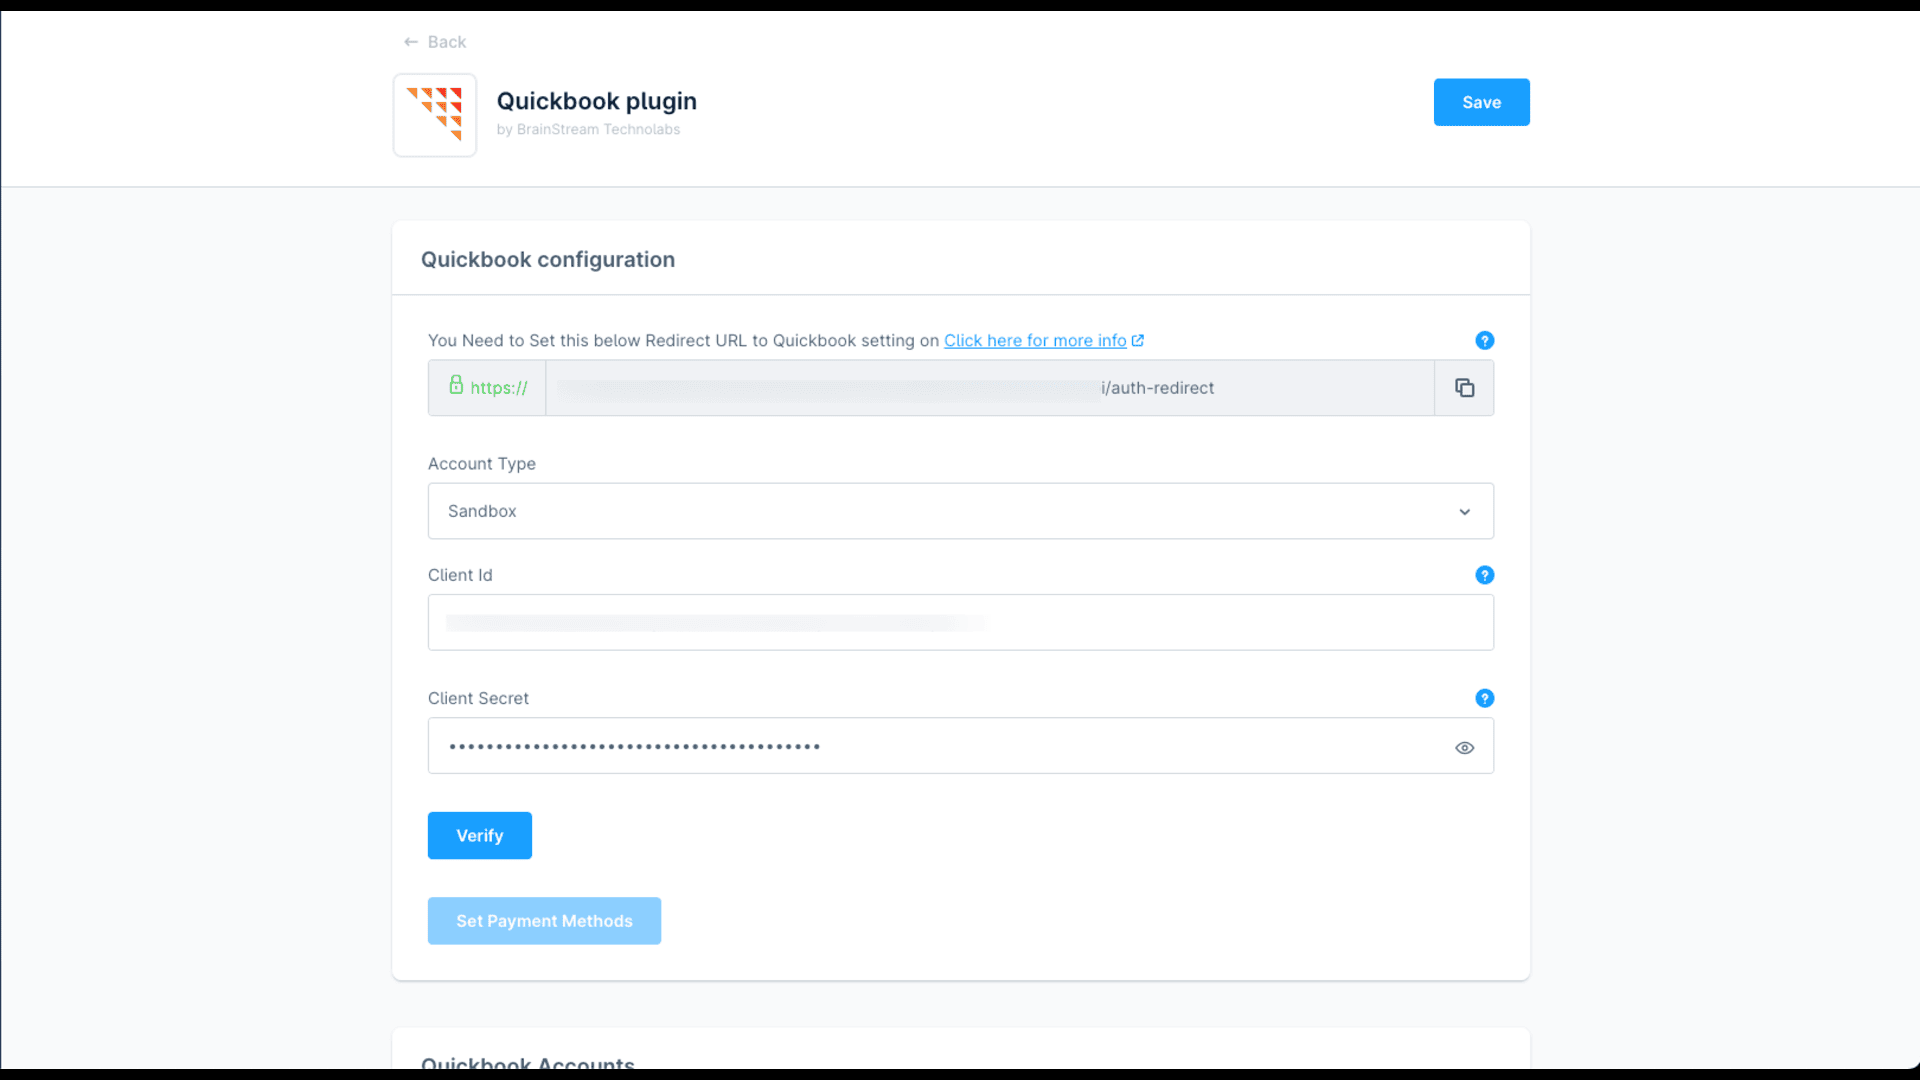
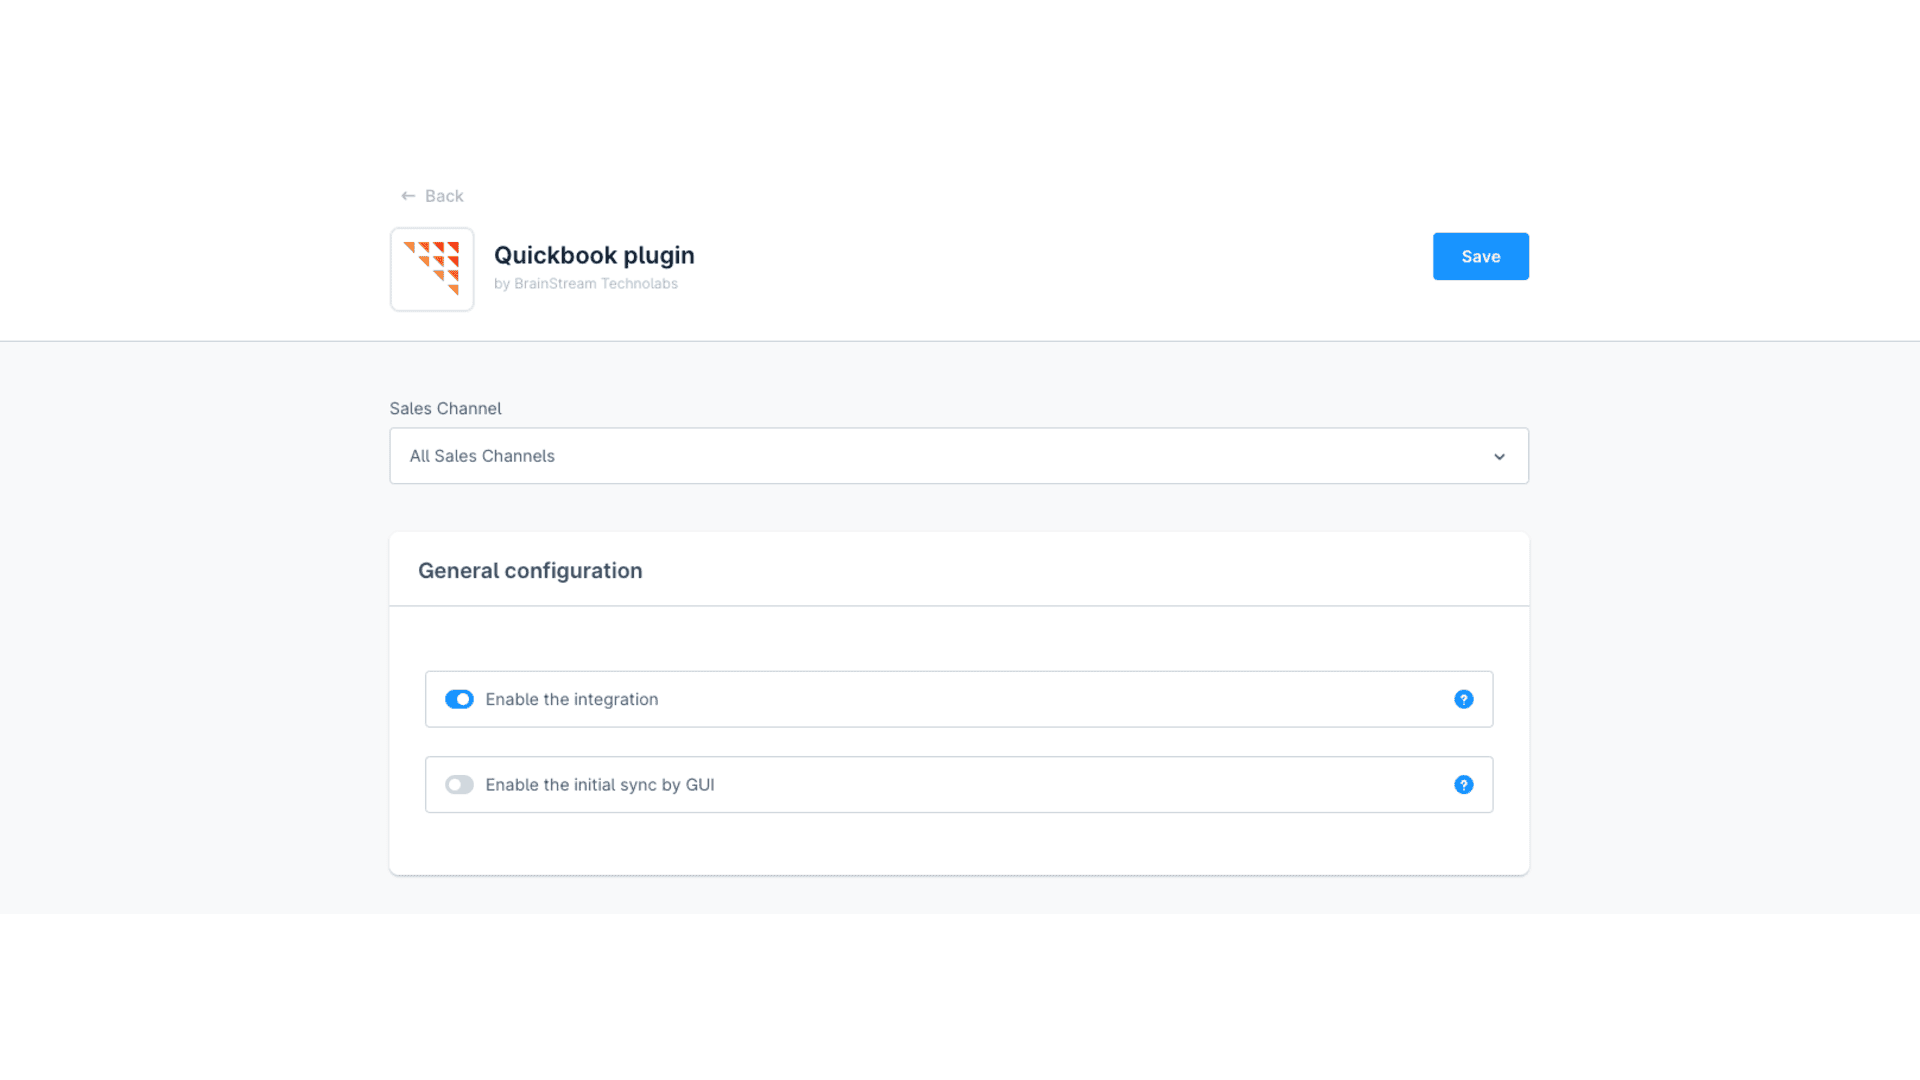
Seamlessly integrate your Shopware 6 store with QuickBooks to automate and streamline your accounting and financial management processes. The QuickBooks Integration Plugin synchronizes your Shopware orders, customers, products, vendors, and financial data with QuickBooks, ensuring accuracy and efficiency.

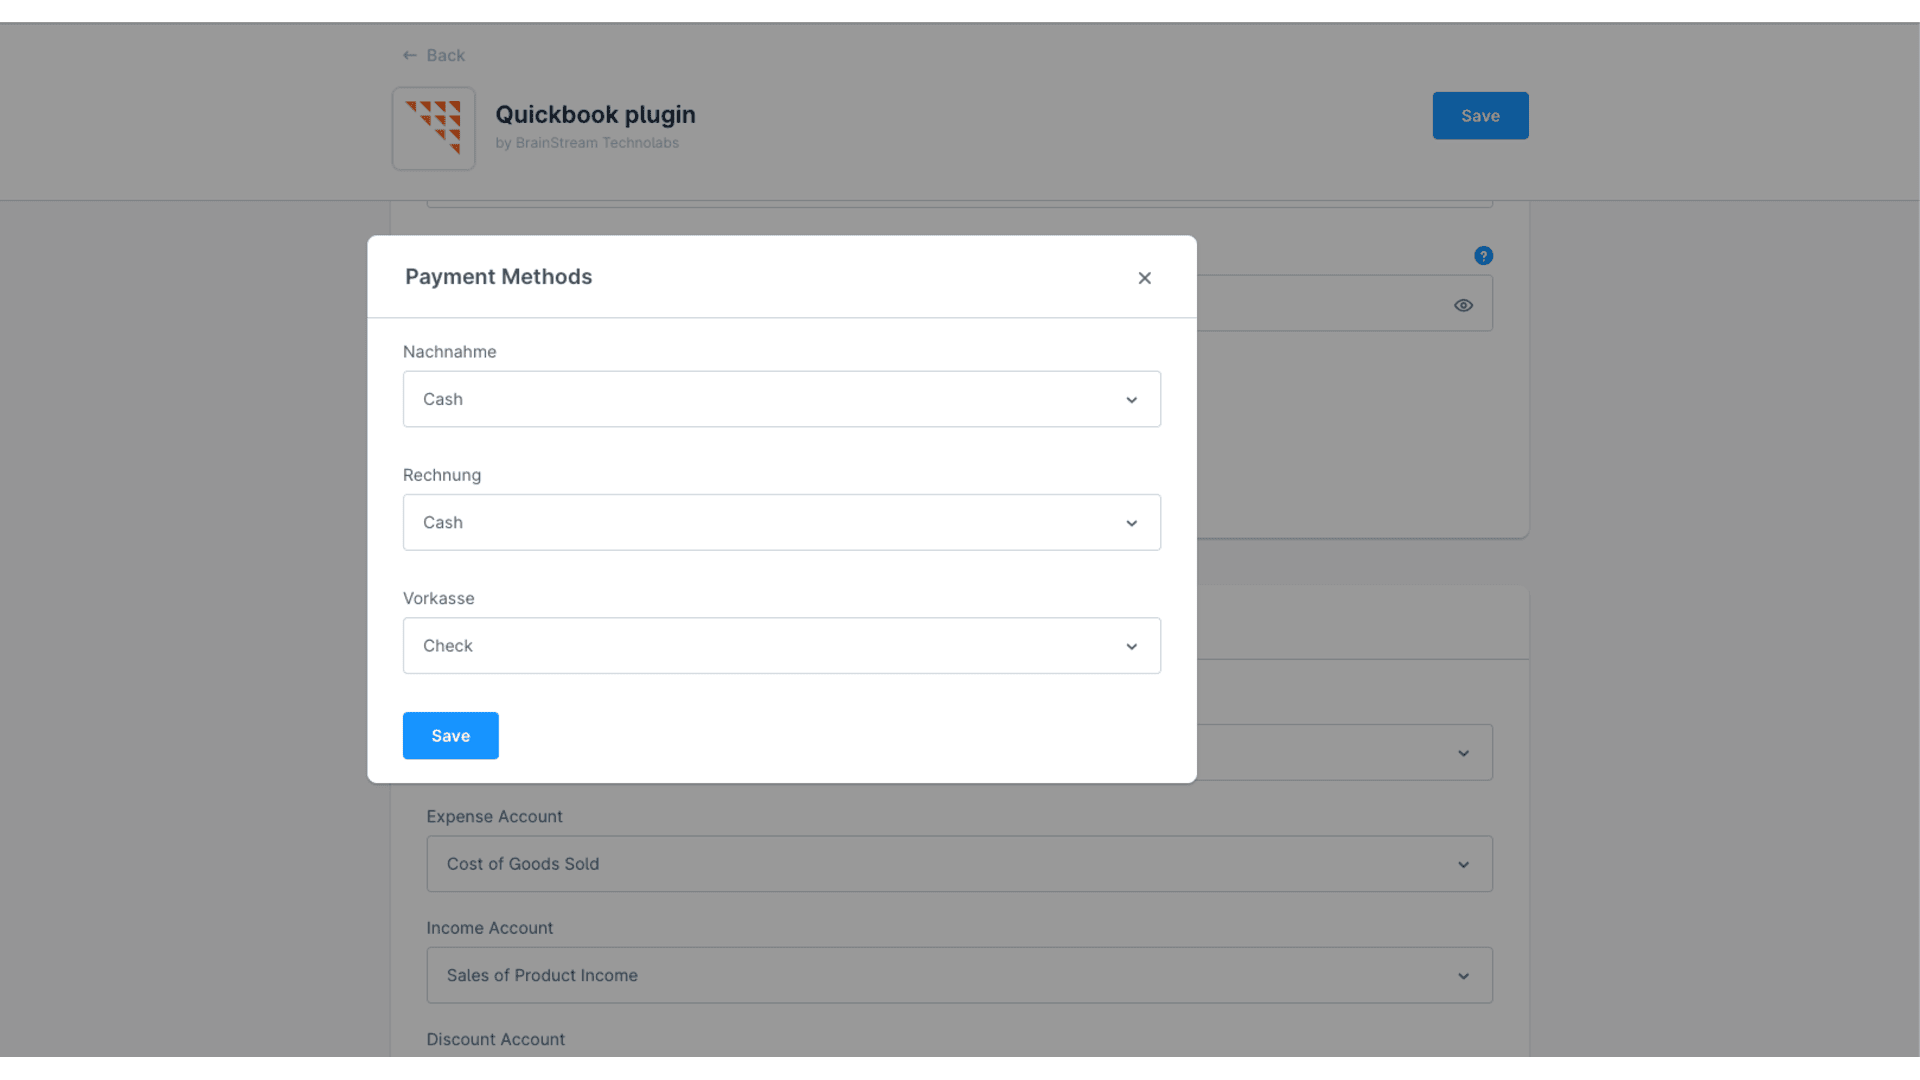
Sales Receipts Sync: Automatically sync sales receipts from Shopware to QuickBooks.

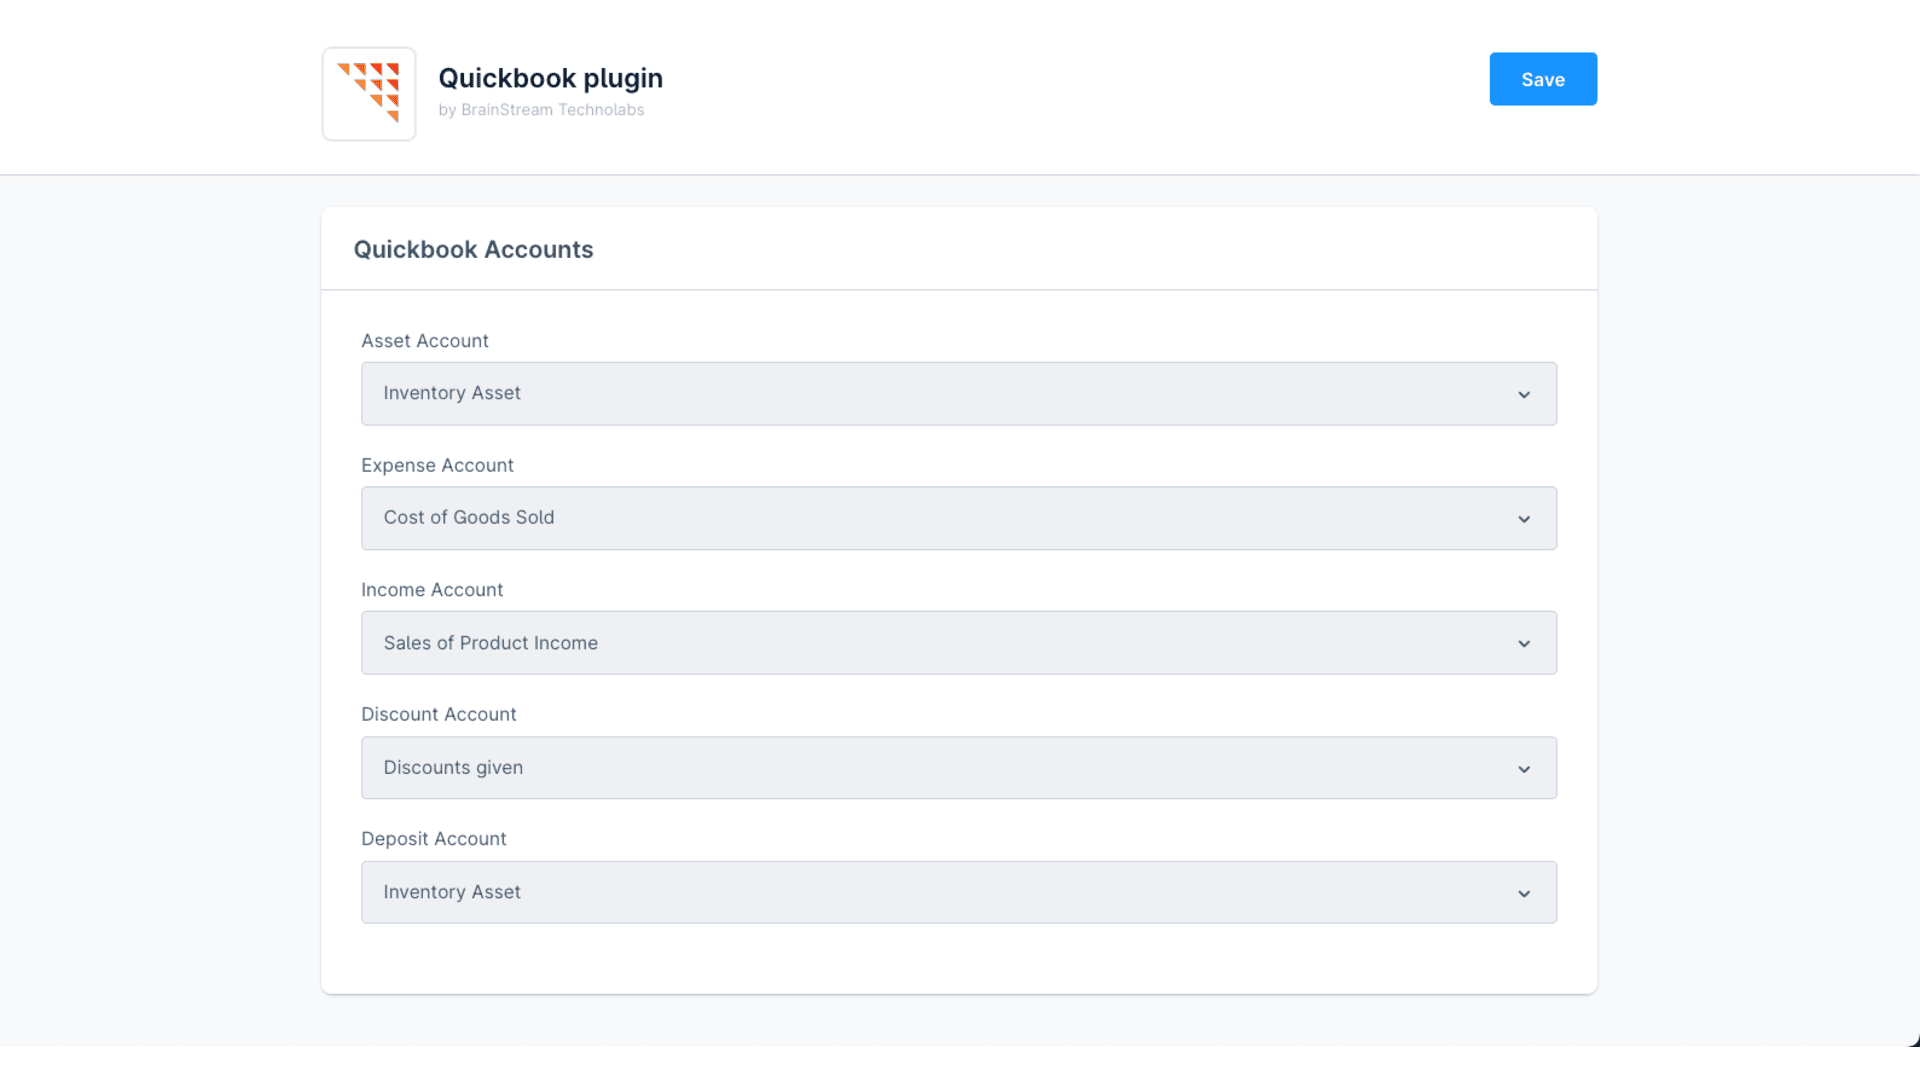
  • Item Management: Sync products and item details between Shopware and QuickBooks for easy inventory and financial tracking.
  • Vendor & Customer Sync: Seamlessly synchronize vendor and customer information to maintain consistent data across both systems.
  • Refund Receipts Integration: Effortlessly manage refund receipts for accurate returns processing and financial reporting.

There are no reviews yet.

Avarage rating

0.0 (Based on reviews)

5
00%
4
00%
3
00%
2
00%
1
00%
Be the first to review “QuickBooks Integration”

Your email address will not be published. Required fields are marked *

No FAQs available for this product.

No Changelog available for this product.

Configuration manual

Install, enable and set configurations.

Quickbook Extension Installation and Configuration Guideline

  • Installation
    • Download the plugin and install and activate from Extensions⇾My Extensions
    • To set config, click on the configure option.
  • Quickbook Setup
    • Sign in to your Quickbook account.
    • Select My Hub > App dashboard from the top-right corner of the toolbar.
    • Select the app card with a + to create a new app.
    • Follow the on-screen steps (Select the accounting scope with Read and Write access).
    • Copy the redirect URL from the plugin configuration and set it up in Quickbook (Ref: Set app redirect URIs)
    • Get Client ID and Secret from QuickBook (Ref: Get the Client ID and Client Secret for your app)
  • Configurations
    • Enable the integration - Set enable integration to Active
    • Enable the initial sync by GUI - provides the option to sync initial data from settings
  • Set all Quickbook configuration details like QuickBooks Client ID and Client Secret.
  • Click on Verify API Connection to verify credentials.
  • Click on Set Payment methods to set up all the payment methods (If you don’t see your desired payment method then create it in Quickbook and select that)
    Note: If you did not select any method used in the order, the sales and refund receipts will be blank.
  • Save the payment methods and close the model.
  • Now select all the Quickbook accounts that are created from the chart of accounts in Quickbook.
    Note: All accounts are required for sync, If any of them are left blank then it will break the sync process and not sync proper data.
  • Save the configurations.
  • Initial sync
    • Go to Settings→Extensions→Quickbook
    • Click on the Sync to quickbook button to initially sync all data.